Wooden Time Machine

I don’t know how to start this introduction, but the punchline is: If you don’t want to go broke buying picture frames made from reclaimed wood that is probably just chemically treated  new lumber, then spend between $10 and $20 and a couple hours making your own. I did and this is how I did it.

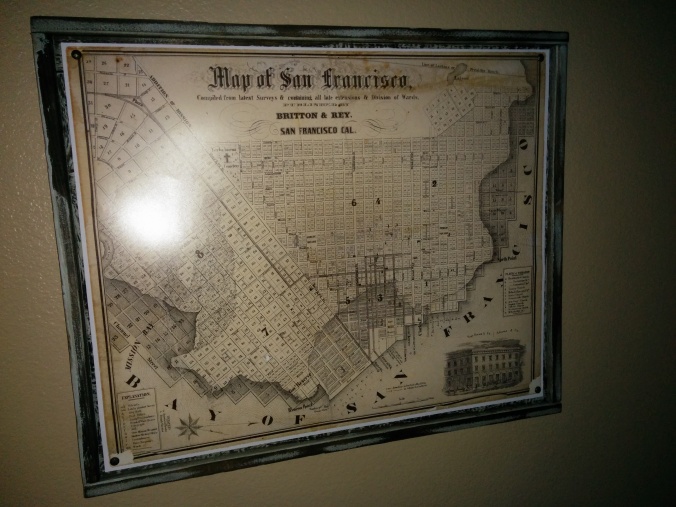
Very recently, I found that I needed a frame for an oddly sized poster. The image on the poster is an 1852 map of San Francisco. Since I’m not a fan of highly ornate antique styles (which I guess might have been appropriate for a wall-hanging object from the 1850’s), a rustic-styled frame was the clear choice since it would make the poster and frame seem like a “found” object. I looked into buying one, but the closest thing I could find to what I imagined were picture frames that looked like they were made from reclaimed wood, but they were so prohibitively expensive they would have cost several times as much as the poster. Since I’ve made a thing or two out of lumber, I knew I could make a frame. The trouble was, how would I get the lumber to look like I wanted? Thanks to the infinitely available information on the internet, I was able to easily find more than a dozen websites describing the process for “distressed” wood finishes and quite a few for “reclaimed wood” finishes. If you’re planning on doing a similar project, you should spend some time looking at the different ways that other people have done similar processes.

The website I used for reference described how to give boards an artificially aged look using three steps: paint the wood, roughly sand a majority of the paint away, then stain the exposed wood to make it look weathered. With this in mind, I bought a sample jar of paint in a light blue color that I chose to be close to the colors in the room. The sample jars of paint only came in flat which is fine because it doesn’t look shiny and new, but the paint will take the stain a little. I also chose a darker stain because I figured it would give the best contrast between the aged and worn and the ‘old’ paint. The stain I used is Minwax’s Jacobean which ended up being a little darker than I was expecting. Your mileage may vary, but I needed a little less than 16 feet of 1 x 2 lumber for my frame design. I chose a material at Home Depot called Trim board primarily because it’s not particularly expensive (20ft cost me ~$7) and also because a couple of the sides are pretty roughly cut. It’s so rough in fact, you’re likely to get a splinter just from looking at it. The roughness works to my advantage over a smoothly cut board because the paint will settle in the low points of the wood, making it easier to leave behind paint remnants when I sand in the second step. After the finish is complete, I’ll need nails and wood glue to hold the whole thing together. One trick I learned the hard way was if you’re going to use wood glue to hold parts together, do the surface finish first, assembly second. The glue chokes the wood grain which prevents the stain from taking hold and the finish will look like salt water dried on the glue joint.

Very Rough Lumber Sanded much smoother
Rough Lumber from the Hardware Store Much more suitable after some sanding

Even with a simple project like this, its best to work from a drawing or a sketch so you don’t get confused and cut the wrong board, so the very first thing I did before I put saw to wood was spend a little time making a post-it sketch. After cutting the boards to length, I spent some more time preparing the wood for the next steps. The little details that go into a project are surprisingly important to giving the finished product a believable appearance. For example, sharp edges and splinters make the boards look new, but breaking the edges and removing the splinters with rough grit sandpaper automatically makes them look older and more worn. As an added bonus, the splinters would have clogged my paint brush if they had stayed, so they must go. I know it must seem like a contradiction that I bought rough wood only to sand it, but I didn’t sand it completely smooth and if you saw how rough this wood is, you would understand completely. Even though I had more than enough paint 100% of the lumber many times over, I didn’t want to waste it (or my time), so I carefully picked which faces of the wood would be showing once the frame was assembled so I knew where the paint needed to go.

Paint

Full Paint Coverage Not Required

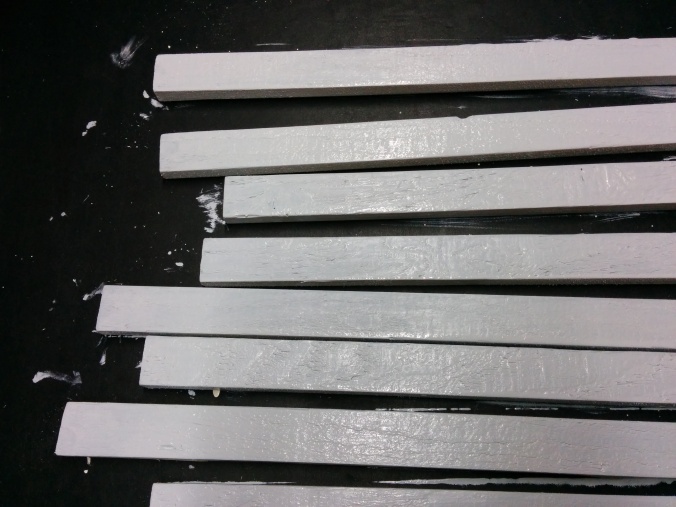
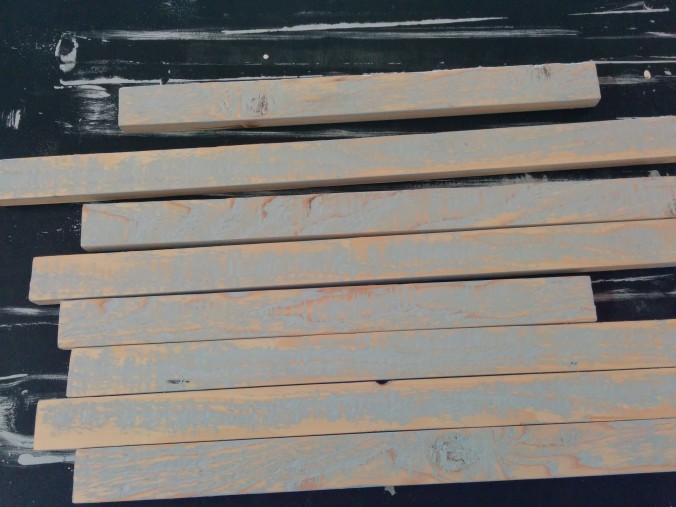
The next step is really easy: slop some paint on the boards and let them dry overnight. The next day, after the paint has completely dried, I used my orbital sander with fine grit sandpaper (the medium and coarse just take the paint away too fast) to work the paint and wood down until there were just remnants in the grain. If you take on a similar project, be careful to sand safely, but don’t be too careful in sanding uniformly because sloppiness will look like age and wear. I made sure to wipe, brush, and blow away the dust before I began staining to keep from cross-contaminating the stain in the can, but also I wanted the frame to look old, not dirty. There’s also one trick I remembered after I was done that I wish I had used here. Instead of just jumping straight into staining this very dry wood which soaks the stain up like a sponge: Spray some water over the boards and let it soak in, then wipe them off before getting started. The water will hinder the stain from setting in too quickly, making it easier to make the grain pop out like aged wood does without turning it all even and dark. I applied the stain, then immediately wiped it off. Because I didn’t do my trick with the water, it ended up a lot darker than I wanted, but the look grew on me. I found that the flat paint I used seemed to soak up some of the stain, but it makes even the paint look a little older, so maybe that’s a good thing, but it’s something to consider when picking your paint color. I let the stain dry out some before I started gluing parts together.

Paint mostly sanded

Painted and Sanded. Ready for Stain.

When I was ready to assemble, it went together in minutes. Just glue, and nail. Glue and nail. I used a sturdy, level table top to make sure the frame was flush as I assembled and a pneumatic brad nailer to fasten the pieces together. When the glue had dried, I attached a couple rings to the back to hang it on the wall and mounted the poster to the front with upholstery tacks that looked like hammered brass. The tacks fit the rustic look I was going for.  Then the most important step: hang and enjoy!

Picture Frame

Finished ‘Reclaimed Wood’ Picture Frame

That was my project day, how was yours?

Did you like It’s Project Day? You can subscribe to email notifications by clicking ‘Follow’ in the side bar on the right, or leave a comment below.
Growing projects one dimension at a time

What do Ikea, Captain EO, and CNC router tables have in common? They all use 2D materials to make 3D things and it’s easy for you to do, too. (even without any of those things)

Mini Rocket

Mini Half-Lap Rocket

There are a TON of things that people use every day made from flat materials… tables, cookie sheets, bookshelves, wooden Santa Clause puzzle kits, picture frames, and even this MDF rocket. Sure factories use automated power saws, die cutters, and tools that cost more than your house, but that’s only because those tools are required by manufacturers to keep their costs per item down. If you only have to make one of something, your technique doesn’t have to be so sophisticated. Even CNC machines and 3D printers can be overkill. The only tools you’ll need for some DIY projects are a sturdy work surface, a saw, and a drill.

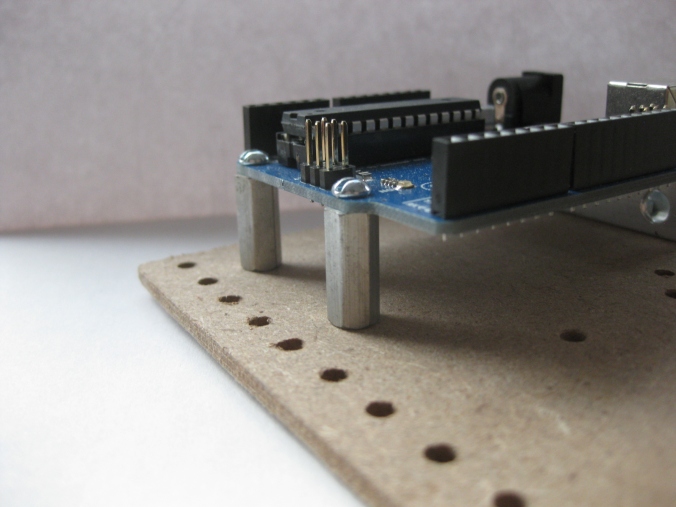
There are many ways to use sheet material to make structures and they all use some combination of opposing forces to make the structure strong. One of the most common (and my favorite) is to use columns between plates to expand the flat dimension of your material. This does two things: First, it makes even a flexible plate more rigid (stronger) the same way an I-beam gets its strength from three relatively thin plates (in engineering terms, this increases the moment of inertia without increasing the weight). Secondly, it adds a lot of volume to what you are making without adding much weight. On a large scale, you could use PVC pipe, a few washers, threaded rod, and some nuts to make the columns. The opposing compression in the pipe and tension in the threaded rod make the column super strong, stable, and rigid.

Arduino with Standoffs

Standoffs are a perfect example of column-separated plates

Another joinery technique is actually the subject of this project day: the half-lap rocket. The idea here is to cut opposing grooves in material so they fit together like a puzzle. When the two pieces are joined together, the structure will be very strong because a force that would bend an unsupported thin plate in half is being opposed by the other plate not wanting to bend along its edge.

One of my favorite projects lately has been some small MDF rockets made out of two cutouts in 1/8″ thick material. The outline of each one is identical and the only difference is that one piece has a slot from the top to the middle and the other has a matching slot from the bottom to the middle. When you put the two pieces together, the rocket is free-standing and 3-dimensional. The best part is, you can make the same figure with some MDF and a coping saw, just follow these simple steps!

1) Draw the object you are going to cut out. Feel free to make anything you like. The guiding principle for the rockets was to make them symmetric with the half-laps made on the dividing line. If you want to use my design to make a rocket ship, print this PDF.

2) Cut out the shapes. Make sure the cutouts are as clean as possible. They will become a stencil in the next step.

3) Trace the stencils onto your material. Remember, the slots won’t work unless the material and the slots are both about 1/8in thick. If your material is a different size, adjust the slot width to match. Make sure to leave some room around the tracings so your cuts in the next steps won’t start right next to the finished cutout.

4) Use a coping saw to cut between the two tracings and cut away most of the excess material. The idea is not to start cutting on the lines of the tracings, but rather to leave room so your cuts aren’t starting right next to the cutout in the next steps.

5) Using a drill, drill a 1/8″ hole at the end of each of the two slots, this will make it easier to finish them. If you don’t have a drill available, you can use a back and forth method to clear the material from the end of the slot in step 7.

6) Make your detailed cuts by cutting lines from the edges of your material to the sharp inside corners. Remember, coping saws can cut contours just fine, but it won’t cut hard angles easily and could even break your blade. Make multiple cuts to take the excess material away in wedges or strips.

7) Now that the exterior of the tracing is gone, cut the grooves. If you have a piece of thick scrap with a straight edge, you can clamp it to your cutout with the edge right on the line of the groove so as you cut, it will make sure the blade doesn’t go too far astray if you lose your line.

8) With the two halves of the rockets done, you can sand the edges smooth, put them together with a little glue in between, and you’re done!

If you’d like to add some finishing touches, you can paint them with a crazy design or add some LEDs for a more retro high-tech effect.

Bonus project!

 IMG_2420

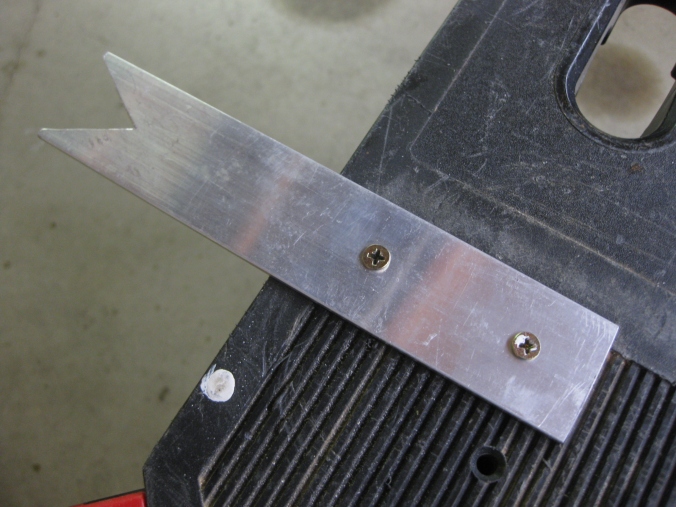
Coping Saw Guide made from 1/8″ aluminum bar

I find its best to use a cutting guide to improve the precision of my cuts and make life easier in general. You can make one with a long strip of scrap. Thick, rigid material is best. Mine is made from a scrap of aluminum plate. Cut a V in one end of the scrap at about a 60 degree angle and secure the other end to your work bench. As you cut, if you keep the saw blade close to the crook in the V, there will be more support on the material, so more of your energy will go into cutting and less into keeping the material flat on the edge of your bench, allowing you to control the direction of your cuts.

Using the techniques here, you can make a LOT of things from mini animals to project enclosures. The possibilities are as limitless as your imagination.

That was my project day, how was yours?

Did you like It’s Project Day? You can subscribe to email notifications by clicking ‘Follow’ in the side bar on the right, or leave a comment below.
Give aging technology a chance

 Think twice before throwing out your old tech. Perhaps that disused piece of junk can have a second chance in your next DIY project.

Let’s rewind the clock to 2001: NASA lands the first spacecraft on an asteroid, Gladiator wins the Academy Award for best picture, and Handspring releases the Handspring Visor Neo, the company’s affordable PDA competitor of the Palm Pilot. At the time, this baby was screaming (for hand-helds) with a 33MHz processor, 8MB of RAM and a high resolution 160×160 pixel gray-scale display. The following year, I was lucky enough to get this high-tech piece of portable technology as a barter deal for helping a neighbour understand how to use their own PDA.

I kept my Visor in working order over the years and it was still limping along when smartphones became affordable and I didn’t need it any more. After it was clear that my old friend was no longer useful as a practical tool, I looked into selling it on eBay, but found more equivalent devices that went unsold than sold so I had the choice of either throwing it out or trying to find something else to do with it. Since I’m not inclined to ‘e-waste’, I started digging around for potential ways I could repurpose it on the internet. Handspring made it’s niche in the PDA market with their springboard expansion slot, so I was really interested in figuring out how to hack it (the device has a docking interface and an IR transceiver, too). Given its age, I had a LOT of broken links to sort through, but I eventually found NS Basic Palm, Pocket C palm, Palmphi, and Palm OS Emulator. It took a while, but I was finally able to hijack the emulator from POSE and use a ROM that I found online to use for exploring the potential of the programming languages on the go. I found out that Handspring once had a development kit for the springboard expansion slot, but was disappointed to find that it was no longer available from Palm.

While I was excited at the prospect of writing apps for a new platform, I realized that there was no way I’d be carrying the Visor around with me on a daily basis, so aside from can-I-do-it curiosity, the Visor was doomed to be recycled. The turning point was when I discovered that the Handspring PDAs (and I suspect other Palm Pilots as well) used serial protocols to sync data with the PC. If you look at the circuit board inside the serial docking station, the connection is direct from PDA to PC. I suspect that the only addition the USB docking station brings is an FTDI. The most exciting discovery was that Pocket C had a couple functions allowing the Visor to establish the serial connection and push data independent of syncing. I suppose I should have figured that this was possible since the Targus Stowaway keyboard connected through the docking port. This was such a revelation: If serial comms was possible, then I could connect this little computer to anything with a serial port…  The possibilities were endless.

130608_CradleMod

A few wires and a Molex connector were all I needed to tap into the serial connections on the cradle


I decided that the best thing I could do was to relieve my computer of the burden of driving my Lynxmotion robot arm. Since the development software I had didn’t include objects like buttons and sliders, I created my own. Using basic drawing features like boxes, lines, and text, I was able to create a GUI with buttons, indicators, and a slider so I could engage the serial port and individually control each servo in the robot. In the process of developing my program, I realized that I needed a controller that could read data from sensors if I wanted the arm to do anything useful, so as it turns out the Visor wasn’t a good fit for the robot arm in the long-term, but the device had proven itself. Who knows what else I might be able to use it for in the future? Maybe it’s going to be my next universal remote control? I still haven’t figured out how to dig into the springboard expansion slot, but I suspect that it’s going to unlock an even bigger potential for my little friend. Perhaps the next step is to reverse engineer the GPS expansion I bought years ago, but could never get to work.

140608_Arm

My standalone robot arm with it’s new(ish) computer brain


The big lesson I learned here was your next project doesn’t have to start as $100+ in new electronics, maybe it starts with that old gadget you have laying around with lots of hidden potential.

That was my Project Day, how was yours?