I don’t know how to start this introduction, but the punchline is: If you don’t want to go broke buying picture frames made from reclaimed wood that is probably just chemically treated new lumber, then spend between $10 and $20 and a couple hours making your own. I did and this is how I did it.
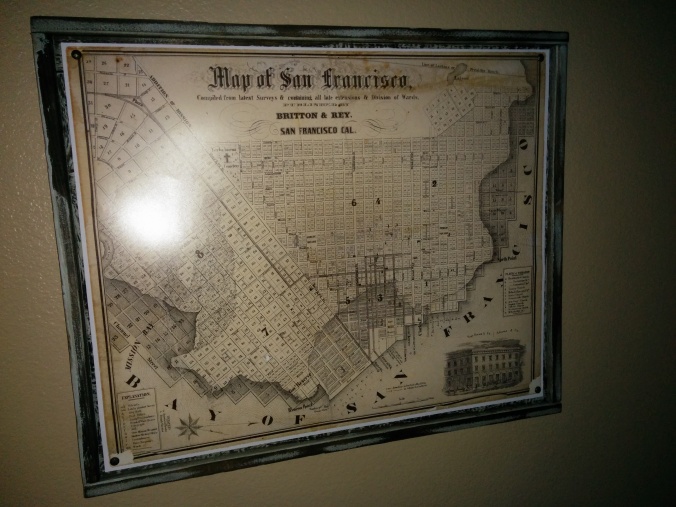
Very recently, I found that I needed a frame for an oddly sized poster. The image on the poster is an 1852 map of San Francisco. Since I’m not a fan of highly ornate antique styles (which I guess might have been appropriate for a wall-hanging object from the 1850’s), a rustic-styled frame was the clear choice since it would make the poster and frame seem like a “found” object. I looked into buying one, but the closest thing I could find to what I imagined were picture frames that looked like they were made from reclaimed wood, but they were so prohibitively expensive they would have cost several times as much as the poster. Since I’ve made a thing or two out of lumber, I knew I could make a frame. The trouble was, how would I get the lumber to look like I wanted? Thanks to the infinitely available information on the internet, I was able to easily find more than a dozen websites describing the process for “distressed” wood finishes and quite a few for “reclaimed wood” finishes. If you’re planning on doing a similar project, you should spend some time looking at the different ways that other people have done similar processes.
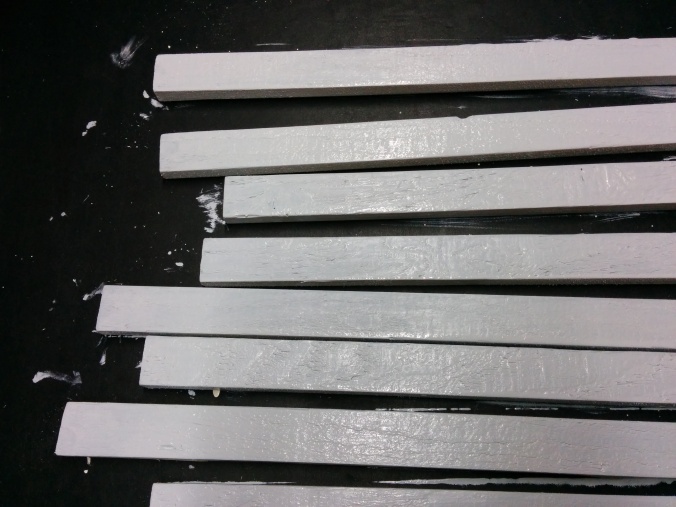
The website I used for reference described how to give boards an artificially aged look using three steps: paint the wood, roughly sand a majority of the paint away, then stain the exposed wood to make it look weathered. With this in mind, I bought a sample jar of paint in a light blue color that I chose to be close to the colors in the room. The sample jars of paint only came in flat which is fine because it doesn’t look shiny and new, but the paint will take the stain a little. I also chose a darker stain because I figured it would give the best contrast between the aged and worn and the ‘old’ paint. The stain I used is Minwax’s Jacobean which ended up being a little darker than I was expecting. Your mileage may vary, but I needed a little less than 16 feet of 1 x 2 lumber for my frame design. I chose a material at Home Depot called Trim board primarily because it’s not particularly expensive (20ft cost me ~$7) and also because a couple of the sides are pretty roughly cut. It’s so rough in fact, you’re likely to get a splinter just from looking at it. The roughness works to my advantage over a smoothly cut board because the paint will settle in the low points of the wood, making it easier to leave behind paint remnants when I sand in the second step. After the finish is complete, I’ll need nails and wood glue to hold the whole thing together. One trick I learned the hard way was if you’re going to use wood glue to hold parts together, do the surface finish first, assembly second. The glue chokes the wood grain which prevents the stain from taking hold and the finish will look like salt water dried on the glue joint.
 |
 |
| Rough Lumber from the Hardware Store | Much more suitable after some sanding |
Even with a simple project like this, its best to work from a drawing or a sketch so you don’t get confused and cut the wrong board, so the very first thing I did before I put saw to wood was spend a little time making a post-it sketch. After cutting the boards to length, I spent some more time preparing the wood for the next steps. The little details that go into a project are surprisingly important to giving the finished product a believable appearance. For example, sharp edges and splinters make the boards look new, but breaking the edges and removing the splinters with rough grit sandpaper automatically makes them look older and more worn. As an added bonus, the splinters would have clogged my paint brush if they had stayed, so they must go. I know it must seem like a contradiction that I bought rough wood only to sand it, but I didn’t sand it completely smooth and if you saw how rough this wood is, you would understand completely. Even though I had more than enough paint 100% of the lumber many times over, I didn’t want to waste it (or my time), so I carefully picked which faces of the wood would be showing once the frame was assembled so I knew where the paint needed to go.
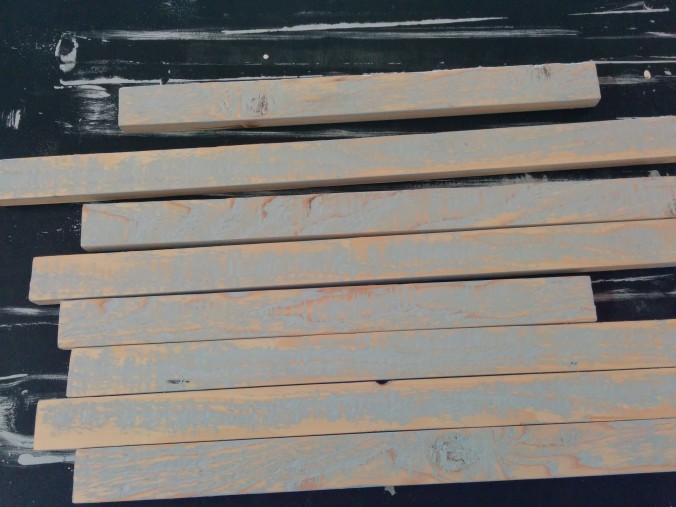
The next step is really easy: slop some paint on the boards and let them dry overnight. The next day, after the paint has completely dried, I used my orbital sander with fine grit sandpaper (the medium and coarse just take the paint away too fast) to work the paint and wood down until there were just remnants in the grain. If you take on a similar project, be careful to sand safely, but don’t be too careful in sanding uniformly because sloppiness will look like age and wear. I made sure to wipe, brush, and blow away the dust before I began staining to keep from cross-contaminating the stain in the can, but also I wanted the frame to look old, not dirty. There’s also one trick I remembered after I was done that I wish I had used here. Instead of just jumping straight into staining this very dry wood which soaks the stain up like a sponge: Spray some water over the boards and let it soak in, then wipe them off before getting started. The water will hinder the stain from setting in too quickly, making it easier to make the grain pop out like aged wood does without turning it all even and dark. I applied the stain, then immediately wiped it off. Because I didn’t do my trick with the water, it ended up a lot darker than I wanted, but the look grew on me. I found that the flat paint I used seemed to soak up some of the stain, but it makes even the paint look a little older, so maybe that’s a good thing, but it’s something to consider when picking your paint color. I let the stain dry out some before I started gluing parts together.
When I was ready to assemble, it went together in minutes. Just glue, and nail. Glue and nail. I used a sturdy, level table top to make sure the frame was flush as I assembled and a pneumatic brad nailer to fasten the pieces together. When the glue had dried, I attached a couple rings to the back to hang it on the wall and mounted the poster to the front with upholstery tacks that looked like hammered brass. The tacks fit the rustic look I was going for. Then the most important step: hang and enjoy!
That was my project day, how was yours?
Did you like It’s Project Day? You can subscribe to email notifications by clicking ‘Follow’ in the side bar on the right, or leave a comment below.


